Showing posts with label CRAFTS. Show all posts

Thursday 9 July 2020

Easy Rakhi Making/Rakshabandan

    Rakshabandan is a popular festival which is celebrated in India,Nepal and other parts of the Indian sub continent.
    It is a celebration of brother and sister like relationship, It's also called Rakhi purnima. It is celebrated on the full moon of the Hindu month 'shravana' in India.
    Sister's tie a thread,called the Rakhi on the wrists of their Brother's on this day.The thread stands for love, fraternity, and lifelong support. Brother's and sister's promise to protect each other on that day. Brother's give gift's to sister's.
    On this critical situation of Covid-19 and lock down's we can't go out to buy Rakhi, so i am going to show u how easy to make Rakhi with silk thread's available in our house. Let's make Rakhi...

Material's Required
  • Silk thread (any color)
  • Glue
  • Scissors
  • Old tooth brush
  • Gold color thread
  • Visiting card
  • Piece of canvas -2
  • Decoration article
Steps to follow:

1.Take silk thread of any color here i took blue and white multi color thread.
2.Rotate it around visiting card 200 times to make 200 strands.
3.Remove them from card and tie a tight knot in the middle with piece of another thread.
4.Cut the edges on both sides and holding in the middle spread the threads evenly as shown.
5.Spread the threads with tooth brush and trim the edges with scissors.
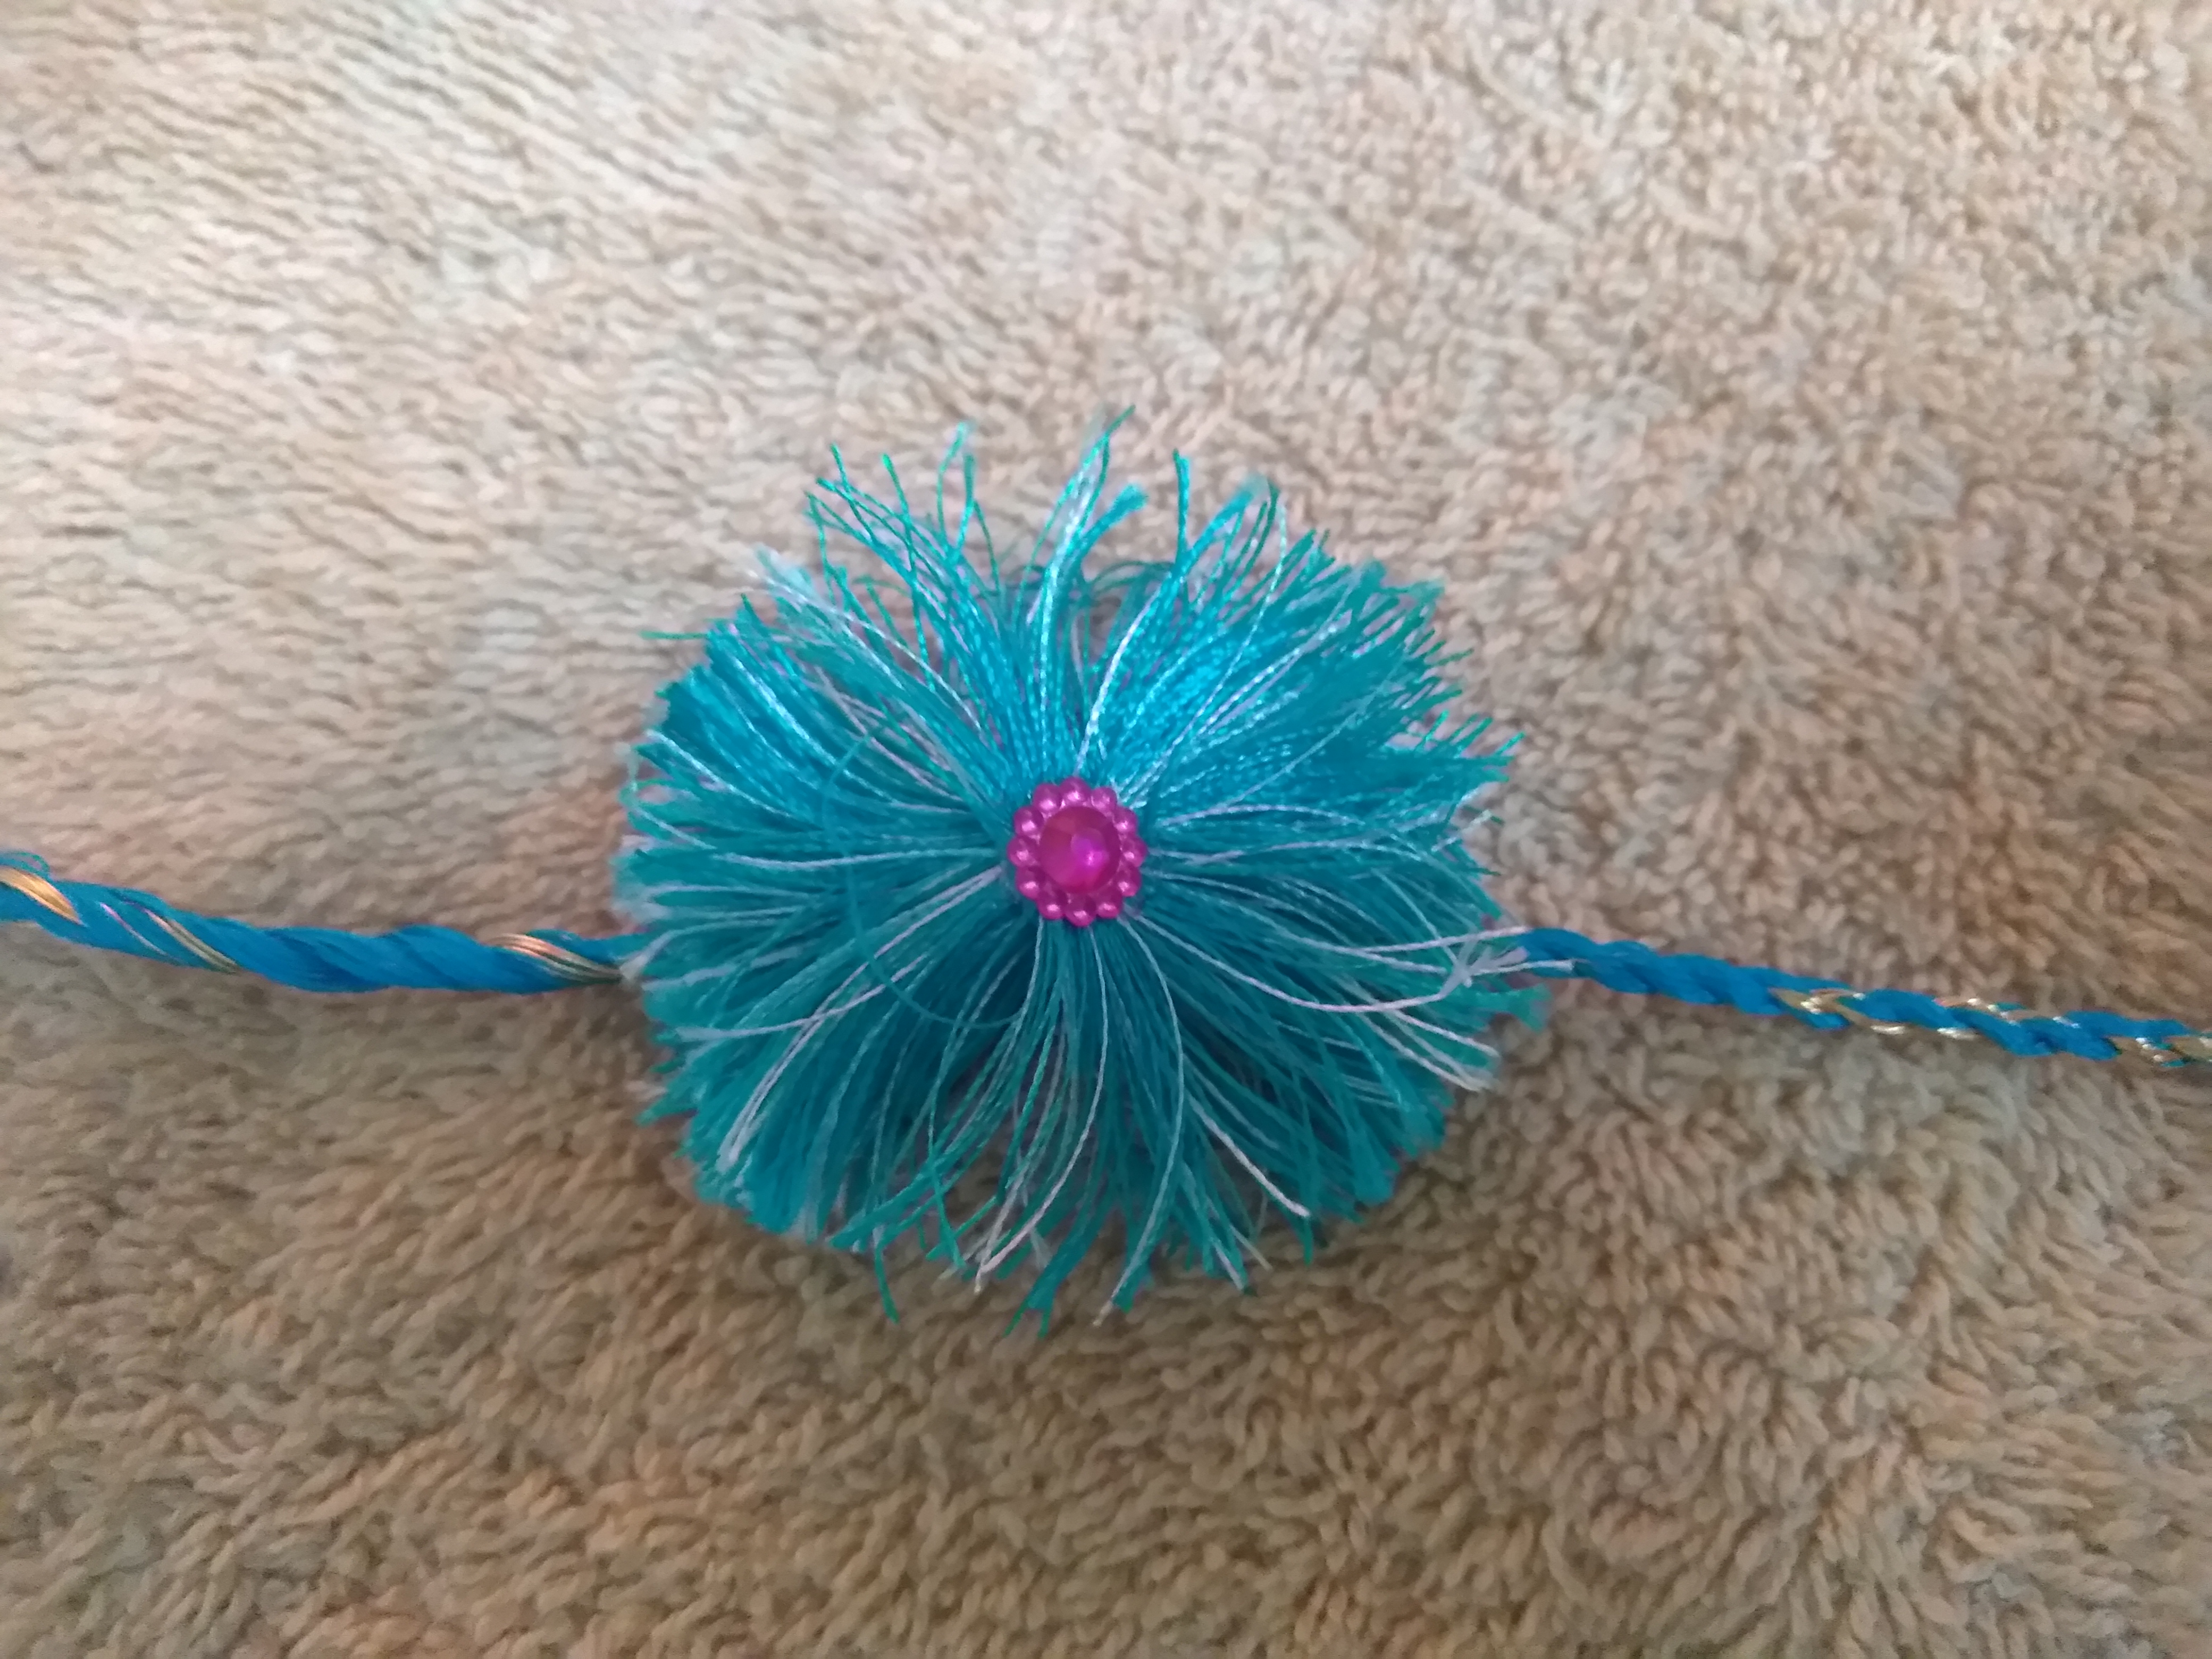
6.Take any decorative flower or button and paste it in center with crafting glue.our middle part of rakhi is done.
7.Now take 10 strands of gold color thread and 21 strands of blue color thread glue at the ends, make a knot.
8.Rotate from the other end and conceal the ends with a knot. 
9.Take a piece of canvas glue it and place the above made thread on it.
10.Place another piece of canvas to cover the below canvas and thread .
11.Again glue the canvas and stick the Rakhi on it.
Our beautiful Rakhi is ready.


Saturday 4 July 2020

GLASS BOTTLE PAINTING(MR & MRS)

    Bottle painting has now become a best out of waste art form.

    There are many ways to paint bottles. Artists are using these bottles as canvas and creating wonderful painting’s and making them beautiful decorative pieces.

    This is an easy and simple bottle painting design. We can use the bottle as a home decor accent or a vase.

    If there is any label on the bottle dip it in a hot water overnight and the label will come off by morning. Clean the bottle with napkin and make sure it’s dry.

    Here I am using a recycled sauce bottles. Let’s enjoy painting.

    I have two bottles so thought of making MR and MRS on them.

Materials Required

  • Glass bottles
  • Water container
  • Fevicryl acrylic color’s
  • Fine art brushes
  • Metallic gold glass liner

Let’s start with taking a recycled bottle.

  • Color the bottle’s with acrylic black color. Do two coats.
  • Let the first coat dry before painting the second.
  • Now take white acrylic color and paint MR and MRS on bottle’s
  • Paint the mustache for MR bottle with red acrylic color and for MRS bottle lips and bhindi. Let them dry completely
  • Take metallic gold glass liner draw any design and keep aside.
  • Our project is done.        
  • For metallic gold liner to dry it will take 15 hours. 


Saturday 27 June 2020

Easy Paper Swing (jhoola, uyalla)

Many of us like Lovely swing’s…. I love swings from childhood.

This is one of the best out of waste project done with Newspapers, Cardboard….

We used to make swing by tying a rope knot to the tree branch near our grandparent’s house in a village and enjoy our swing’s. Remembering that I tried to make a paper swing for you. U can also do it easily along with me and enjoy the joy of crafting.

Things Needed for this Paper Swing

  • ·      News papers
  • ·      Small cardboard
  • ·      Green color paper
  • ·      Scissors
  • ·      Brown color acrylic color (water color)
  • ·      Thermocol balls
  • ·      Pencil
  • ·      Crafting glue
  • ·      Painting brush


Let’s start our paper swing making


  • Take a cardboard of length 22cm and width 12cm.
  • Warp it with green color paper and glue it to other side.
  • Take the newspaper roll it and secure the end with glue as shown.
  • In the same way make 3 white paper rolls and 10 newspapers rolls.
  • Glue these paper rolls on a paper and cut the extra edges.
  • Color the news paper rolls with dark brown color and let it dry completely.
  • Take 2 white paper rolls of equal length and fold in the middle like a stand as shown in the picture.
  • Keep another white paper roll in the middle of the stand and glue it.
  • Take 10cm length and 6cm width another cardboard and fold the width in the middle at 3cm.
  • Take 2 white paper strips of 3mm and glue to the small cardboard swing chair and secure the ends to the stand.
  • Slightly Bend in the middle of brown paper rolls glue it. and cover the swing stand.
  • Take green color paper make cuts and roll it keep them in 4 corners of the swing and glue them.
  • At last decorate the cover of the swing with thermocol balls. Our lovely swing is ready.

FOR YOUR EASY UNDERSTANDING VIDEO OF PHOTOS WITH DETAILED DESCRIPTION IS UPLOADED

DUM ALOO RECIPE

       Today we are going to prepare easy, delicious, creamy & flavorful Dum Aloo.      Dum aloo is one of the classic Indian dishes ser...